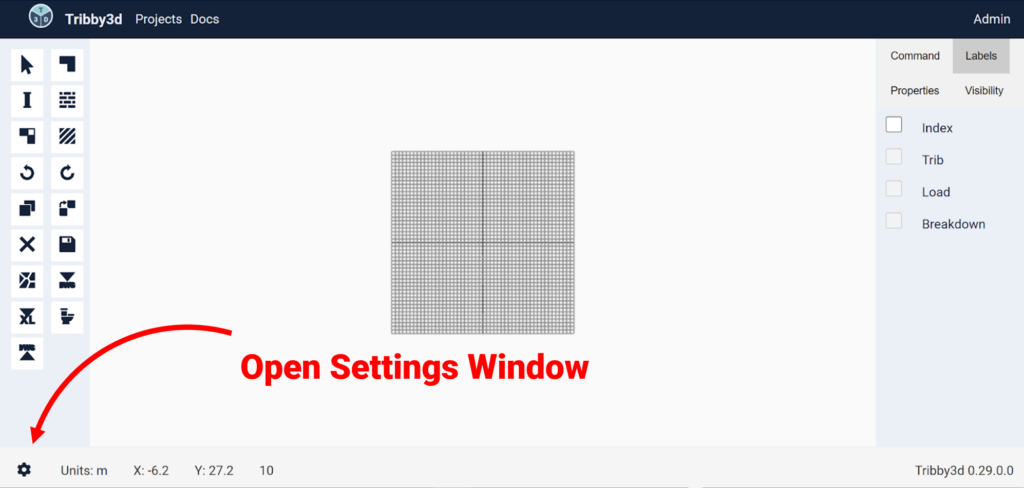
Tribby3d allows you to custumize the behavior and various aspects of the application through a Settings interface. To show the settings window, hit the cog icon down to the left on the status bar.
This will show you a modal containing 4 tabs which you can switch between. Use the different components to change the preferred settings. When done, make sure to hit the “Apply” button before you exit, otherwise the changes will not take effect. You can press cancel or the “x” button to exit the settings window at any time. Note that settings are saved for a particular project and will persist if you log out and log in again.
Display
The settings under the display tab handles options related to properties of the viewport including grid and text objects.
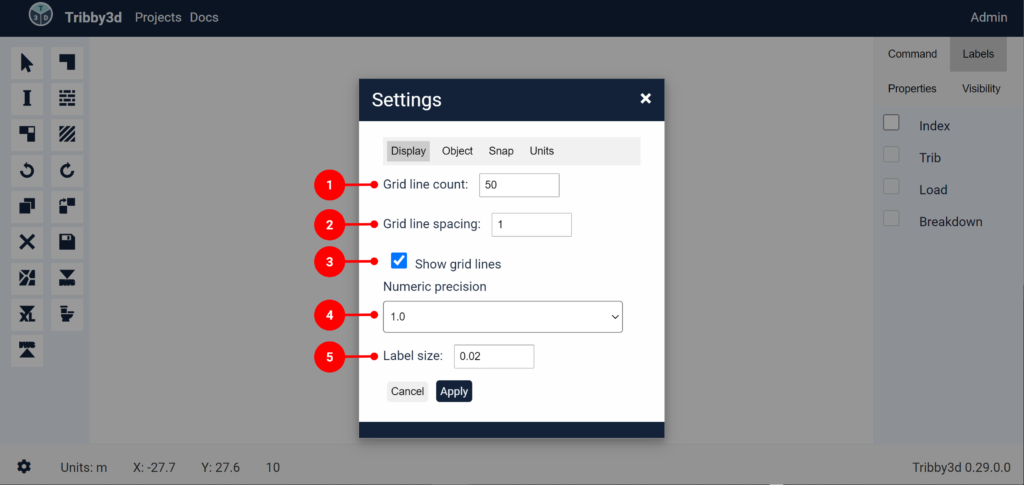
- Grid line count: Sets the number of grid lines to show in X and Y directions. The intersections of the grid lines defines the snapping points when Grid snap is activated.
- Grid line spacing: Sets the distance between the grid lines in both X and Y directions.
- Show grid lines: When checked grid lines are visible in the view port. When unchecked, grid lines are hidden.
- Numeric precision: This sets the number of decimal places shown for floating numbers displayed in the user interface. Examples of this would be labels, coordinates, analysis output and more. Note that this setting does not affect the tolerance of the calculations – it is only used to round numbers to make it more readable.
- Label size: Labels are text tags containing data that is used to display properties of objects in the view port. For instance, the tributary area of the columns can be shown in the view port. The “Label size” setting controls the size of these labels.
Object
The settings under the “Object” tab handles options related to how elements are displayed in the view port. Example of elements are columns, walls, floors and area loads. These settings can be useful when modeling objects in scales that go beyond the defaults in Tribby3d. For instance very small structures or very big structures.
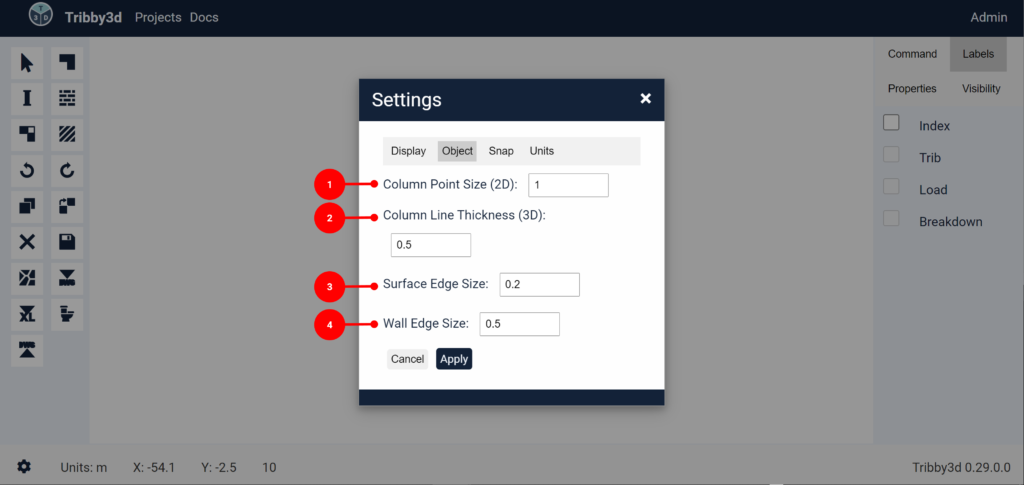
- Column Point Size (2D): Sets the radius of the points representing column objects in 2D view port.
- Column Line Thickness (3D): Sets the thickness of the lines representing column objects in the 3D view port. Note that this setting only applies to Multi-story project types.
- Surface Edge Size: Sets the thickness of the perimiter and opening edges for surface based objects, such as floors, area loads and tributary areas.
- Wall Edge Size: Sets the thickness of the lines representing wall objects in the 2D view port.
Snap
The settings under the “Snap” tab let you control the snapping behavior when adding or modifying objects in the view port. This can help you to model the coordinates of objects with improved accuracy, because points will be “sucked in” to nearby positions in the view port.
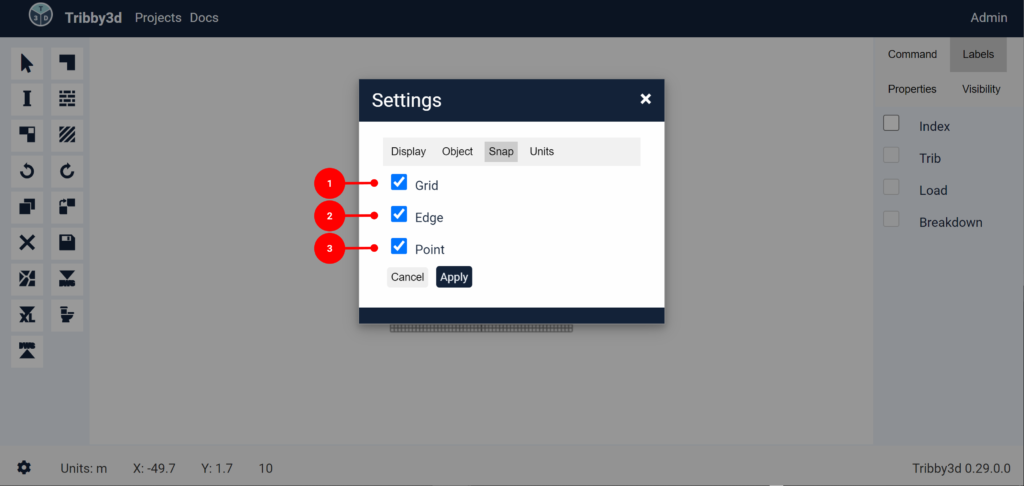
- Grid: Toggles grid snapping on/off. When enabled, coordinates will get snapped to the closest grid intersection. You can control the size of the grid under the “Display” tab in the Settings window.
- Edge: Toggles snapping of edge objects on/off. When enabled, coordinates will get snapped to closeby surface edges (perimiters and openings) and line based objects. In the context of Tribby3d, “surfaces” refers to flat two-dimensional elements, such as floors and area loads. “Line based” refers to one dimensional objects, such as the lines representing the walls.
- Point: Toggles snapping on/off of objects that are represented as points in the view port. An example of this is columns.
Units
The settings under the “Units” tab let you update the unit settings of the project.
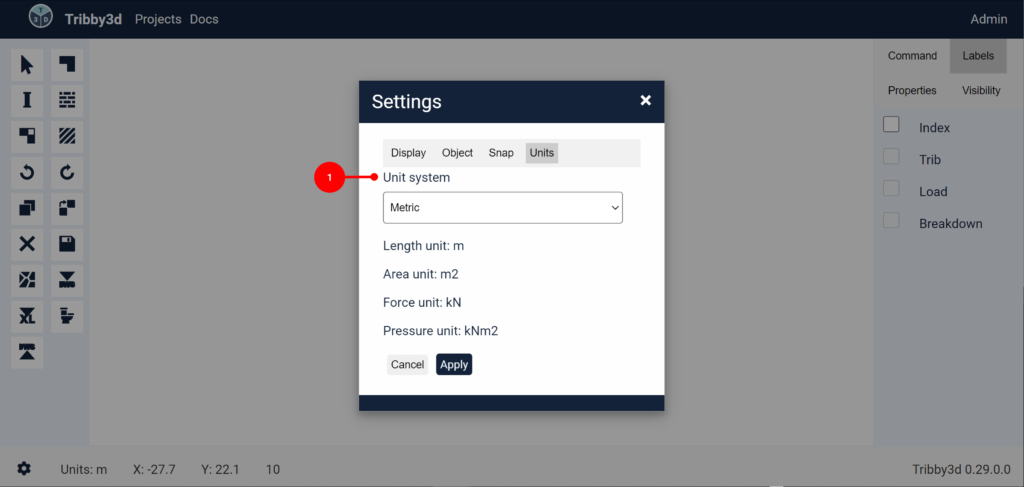
- Unit system: This dropdown lets you toggle between Metric and Imperial unit settings. When metric is selected, the following units will apply:
– Meter (m) for length units
– Square meter (m2) for area units
– Kilo Newton (kN) for force units
– Kilo Newton per square meter (kN/m2) for pressure units
When imperial is selected, the following units will apply:
– Decimal feet (ft) for length units.
– Square feet (ft2) for area units
– Pound (lb) for force units
– Pound per square feet (psf) for pressure units
Note that in the current version of Tribby3d, existing elements in the view port will not rescale after changing units. Therefore, it is recommended to change the units before adding elements to the view port.