This article describes columns in Tribby3d including how they work, how they can be created and other related aspects.
General
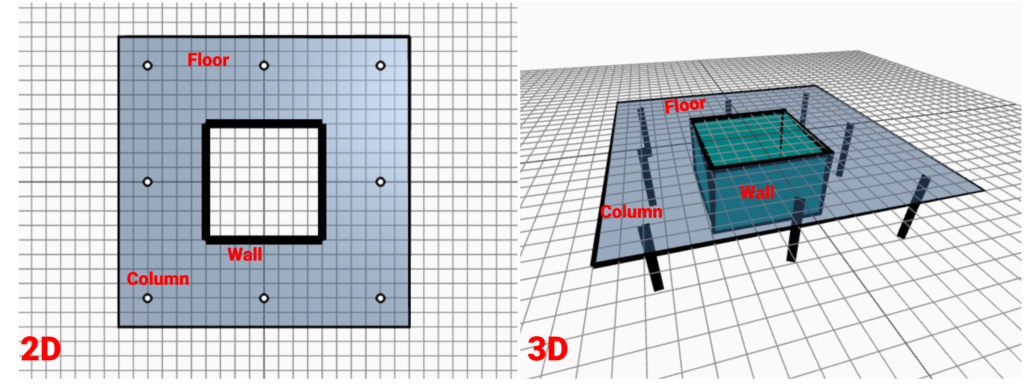
Columns play a major role in Tribby3d’s feature set. Along with walls, they are one of the vertical load bearing elements you can calculate the tributary area of. In Tribby3d, columns absorb vertical loads from the floors using the principle of tributary area.
Add Column
- Click on the “Draw Columns” button in the toolbar.
- Left click in the view port where you would like the columns to be placed. Note that the coordinates of points are displayed in the status bar as well.
- When you are done drawing columns, simply right click on the mouse or press the “Cancel” button in the panel to the right.
The coordinates will automatically be snapped to the closest grid point, columns, walls and other floors. If you wish to turn off automatic snapping, this can be achieved in the snap settings. Additionally, columns can also be added numerically in the command panel as an alternative to clicking in the view port. See below:
Remarks
- When columns are visualized as points in Tribby3d’s plan view, please be aware that these represent the upper ends of the columns on the story below. In other words, when you see a floor and columns in the same view port (like in the animation at the bottom of this post), the column are beneath the floor and support it structurally. This is different from plan views in most other structural engineering software, but beneficial for the context of Tribby3d, where load takedowns are in focus.